28 Comments


These Homemade Gel Ice Packs Are So Handy To Have Around!
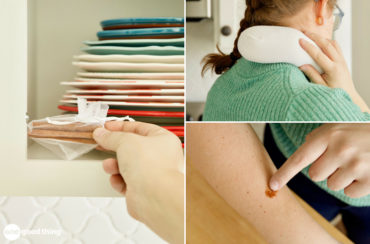
While raising four kids (or any kids for that matter), you get used to dealing with sprains, strains, and other minor injuries. Between football, basketball, skateboarding, snowboarding, and dance, I’ve sat with my kids in plenty of clinic waiting rooms and emergency room lobbies over the years!
Somewhere along the line, I learned to use R.I.C.E. when dealing with “soft tissue” injuries. No, not the rice you keep in your pantry—the R.I.C.E. treatment they teach for first aid!
R.I.C.E. stands for Rest, Ice, Compression, and Elevation, the conditions recommended by doctors to ease discomfort and speed up recovery from minor injuries. And since we moms are often the “nurses” when our kids are injured, speedy is the type of recovery we’re usually hoping for! :-)

Why It’s Important To Ice An Injury
Icing an injury with a cold pack in 20-minute increments is an important part of the R.I.C.E. treatment, helping to reduce swelling and keep pain under control. This post will help make icing an injury easier, because you’ll learn how to make a DIY ice pack using common household items.
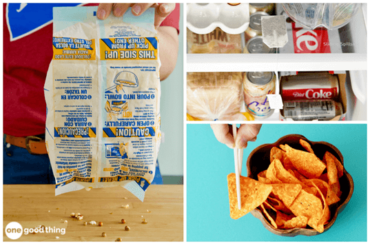
Not only will keeping one in your freezer mean you’re always prepared for unforeseen injuries, but you won’t have to resort to a bag of chunky ice cubes or frozen peas either!
Related: How To Clean Your Ice Maker (Easy Step-By-Step Tutorial)
How To Make A Homemade Ice Pack: 3 Easy Options

Option #1: Alcohol Ice Pack
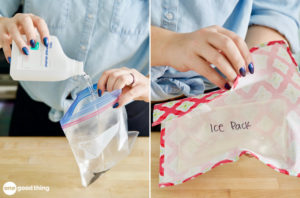
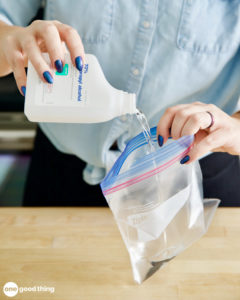
The quickest and easiest way to make a DIY ice pack is to use rubbing alcohol. Combine 1 part rubbing alcohol with 1 part water in a ziplock freezer bag, then squeeze as much of the air out of the bag as possible and zip it closed.
Put the bag in your freezer until it’s icy, then it’ll be ready to use. The rubbing alcohol will prevent the water from freezing solid, making it malleable and easy to conform to any area of the body.

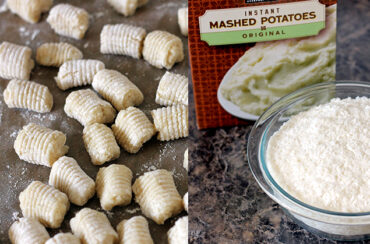
Option #2: Dish Soap Ice Pack (Homemade Gel Ice Pack)
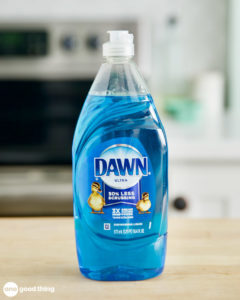
I’ve said it before and I’ll say it again: there’s very little you can’t accomplish with Dawn dish soap, and that includes making a malleable homemade ice pack! Pour dish soap into a ziplock bag until there’s enough to form a thick layer if the bag were lying flat, then zip the bag closed and freeze it.
If you want it to be more flexible and gel-like — like a blue gel ice pack — remove it from the freezer and apply to the injury after about 2 hours. The longer you freeze it, the less malleable it will be (though it won’t solidify completely).

Option #3: Corn Syrup Ice Pack
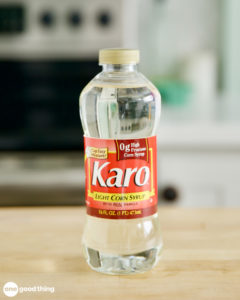
Corn syrup makes another useful medium for a homemade ice pack. Just fill a ziplock freezer bag about halfway full of corn syrup, zip it closed, and stick it in your freezer until it firms up.
The “frozen” corn syrup stays slushy and flexible, so this is a great choice if you’re making one to keep in your freezer just in case. (One obvious drawback is that the corn syrup would create an incredibly sticky mess if the bag got ripped or punctured, so I would double-bag this one, for safety’s sake!)

Which Homemade Ice Pack Is Best?
I think all three options have their merits, so I say use whichever method you have the supplies to make! If you’re in need of an ice pack ASAP, I’d suggest the 2nd option, since the dish soap ice pack only needs to be frozen for a couple of hours before it’s ready to use.
If you’re making an ice pack to keep in your freezer just in case, you can’t go wrong with the 1st or 3rd options. They’ll stay more malleable than the dish soap, so you can wrap them around ankles, knees, or wrists right away without having to wait for them to thaw out first.
More Ideas You'll Love


How To Use Your Homemade Ice Pack
After a minor injury, apply an ice pack as soon as possible. Icing early and often for the first 24-48 hours will help minimize swelling and reduce pain, both of which will aid in the recovery process.
Cold packs can also be useful for chronic conditions, like muscle injuries related to overuse. In these cases, icing the affected area after activity and exercise can help control inflammation and speed up recovery.
Keep in mind that icing isn’t useful for every type of injury! For instance, you shouldn’t use ice to treat muscle or joint stiffness, and those with poor circulation should avoid icing as well. In these cases, heat therapy (like a heating pad) would be a better choice.
4 Bonus Tips For Using Ice Packs

1. Wrap It To Protect Your Skin
You always want to wrap an ice pack in a kitchen towel before applying it to an injury. Placing ice or something frozen directly against skin can cause damage to the skin and tissues. (You’re trying to cool the injured area, not freeze it!)

2. Beware Of Leaks
To avoid major messes, it’s a good idea to take additional measures to avoid your ice pack from leaking. If you’re using a ziplock bag, choose freezer bags (which are thicker) and put one inside another for an added layer of protection.
If you have a FoodSaver or other type of vacuum sealer, use it to seal your homemade ice pack. The seal will be quite sturdy, and the vacuum bag will likely be much stronger than standard ziplock bags to begin with.

3. Label It (Or Make It Look Distinctive)
You don’t want to accidentally mistake your ice pack for frozen food, or vice versa! Make sure your ice pack is easy to identify by labelling the bag clearly before you fill it. You could also add a few drops of vivid food coloring to make it visually distinctive from other things in your freezer, but that’s totally optional.

4. Try Different Sizes
Not every injury is going to require a gallon-sized ice pack, so you may want to consider making homemade ice packs in different sizes if you’re going to keep them on hand. Gallon-size bags work well for ankles and wrists, while a quart-size bag would be a more appropriate size for sprained fingers or toes.
What’s your best tip or trick for minor injuries?
Homemade Ice Packs (Step by Step)
Equipment
- Ziplock Bag
Ingredients
Alcohol Ice Pack
- 2 cups water
- 2 cups rubbing alcohol
Dish Soap Gel Ice Pack
- 1.5 cups dish soap
Corn Syrup Ice Pack
- 2 cups corn syrup
Instructions
Alcohol Ice Pack
- Mix 1 part rubbing alcohol with 1 part water in a ziplock freezer bag, then squeeze as much air out as possible.

- Zip it closed and put it in your freezer until icy.
Dish Soap Gel Ice Pack
- Fill a ziplock bag with dish soap until there’s enough to form a thick layer when it lies flat.
- Squeeze as much air out of the bag as possible, then seal the bag and freeze it for 2 hours.
Corn Syrup Ice Pack
- Fill a ziplock freezer bag about halfway full of corn syrup.
- Squeeze as much air out of the bag as possible, then seal the bag and freeze it.
More Ideas You'll Love